# Super fast React Localization 🌍 (i18n) with i18next and Tolgee 🐁
So you develop an app in React and you want many users to use it, right? To make your app usable for users in foreign
countries, you have to translate your App to their languages. 🇬🇧 🇨🇳 🇮🇹 🇪🇸 🇫🇷
In this article, I am going to show you, how to integrate i18next and Tolgee into your project and how easy and fast you
can translate a React app using these tools.
> Tolgee has also its native integrations. Which are a bit easier to set up, so if you're not used to i18next, maybe it
> would be easier for you to [start with those](http://tolgee.io/docs/web/using_with_react/installation/docs/web/using_with_react/installation).
### What is [i18next](https://www.i18next.com/)?
`i18next` is a library enabling you to localize your app. Basically, you are calling methods of this
library providing keys to be translated. The methods return value in specified language retrieved from localization
files. There is much more about i18next, but let's keep it simple for this tutorial. You can read more about
i18next [here](https://www.i18next.com/).
### OK! And what is [Tolgee](https://tolgee.io)?
Tolgee is an open-source tool combining localization platform and integrations to provide a simple way to translate the web
applications for both developers and translators. 👨💻👩🏻💻🧖🏼👩🏻💻🧖🏼
Tolgee Localization Platform is a place, where you can manage all your localization strings in the simple UI. It's made
to simplify the localization process as much as possible. With Tolgee you can translate the localization strings
directly in the application you develop without editing localization data files. You can also automatically generate
screenshots from your app, which can be used in the future by translators of your project.
So let's dive in to the hacking!
## Bootstrapping the App 🔥
I am going to use Create React App for this, since it's the simplest way to bootstrap a React app.

I am going to use Typescript, but if you're JavaScript purist, remove the `--template typescript` part. Open your
terminal and command it to execute...
```
npx create-react-app@5.0.0 i18next-tolgee-demo --template typescript && cd i18next-tolgee-demo
```
Then install packages necessary for the localization (i18n).
```
npm install react-i18next i18next-icu i18next @tolgee/i18next @tolgee/ui
```
If the process succeeded we are prepared to start hacking! 😎
Open the project in your favourite editor, and go to `App.tsx` and replace all the crap with this:
```tsx
import React from 'react';
import './App.css';
function App() {
return (
Hello world!
);
}
export default App;
```
We don't need the default CRA content.
## Setting up a Tolgee project
To get started, we are going to need a new project in Tolgee Platform.
1. Login to [Tolgee Platform](https://app.tolgee.io) or use your
self-hosted [Tolgee instance](https://tolgee.io/docs/platform/self_hosting/running_with_docker).
2. Create a new project by clicking **`Add` button in the top right**. And fill the project name.

Optionally, you can add multiple languages to translate your app into.
3. Expand your user menu in top right corner and choose API keys.
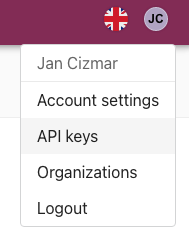
4. Hit **plus button**, then leave all checkboxes checked and click **save**.
5. Done. You have obtained your API key!
## Configuring i18next with Tolgee
First, let's create a file called `.env.development.local` in the project root. This file contains our Tolgee
configuration.
```
REACT_APP_TOLGEE_API_URL=https://app.tolgee.io
REACT_APP_TOLGEE_API_KEY=
```
Then go to `index.tsx` and configure `i18n` object from `i18next` library.
```ts
import {withTolgee} from '@tolgee/i18next';
import i18n from "i18next";
import ICU from 'i18next-icu';
import {initReactI18next} from "react-i18next";
withTolgee(i18n, {
apiUrl: process.env.REACT_APP_TOLGEE_API_URL,
apiKey: process.env.REACT_APP_TOLGEE_API_KEY,
ui: process.env.REACT_APP_TOLGEE_API_KEY
? require('@tolgee/ui').UI
: undefined,
})
.use(ICU)
.use(initReactI18next)
.init({
supportedLngs: ['en', 'cs'],
fallbackLng: 'en'
});
```
This sets Tolgee as translation provider for i18next and enables
[ICU message formatter](https://tolgee.io/docs/icu_message_format). Change
`supportedLngs` to language tags you created while creating project in Tolgee platform.
Then wrap your `` component with `Suspens` component.
```jsx
Loading...}>
```
So when translations are loading, fallback is rendered.
## Translating on steroids 💪
Now we can start translating. Let's go to `App.tsx` again and obtain `t` function by calling `useTranslation` hook. Then
use the t function in the returned JSX.
```tsx
function App() {
const {t} = useTranslation()
return (
{t('hello_world', 'Hello world!')}
);
}
```
The first parameter is the translation key, which is a unique identifier of the string. Normally I would recommend to
also provide some information about the placing of the string in the app. So if the text is for example placed in
settings, it would be good practice naming it `settings.hello-world`. The second parameter is default value, which is
going to be rendered, when no translation is provided in localization data.
Now start the dev server or **restart it, if you already started**, so the **.env properties are refreshed**.
```
npm run start
```
After project is built, open it in the browser. You should see `Hello world!` 👋 message.
Now let's do some the magic. 💫

Click on the "Hello world!" text while holding **Alt key** or **⌥ key** on Mac.
Quick translation appears if everything is configured well. If not, double-check your `.env.development.local` and check
the properties are accessible in the browser by printing them to console using `console.log()`.
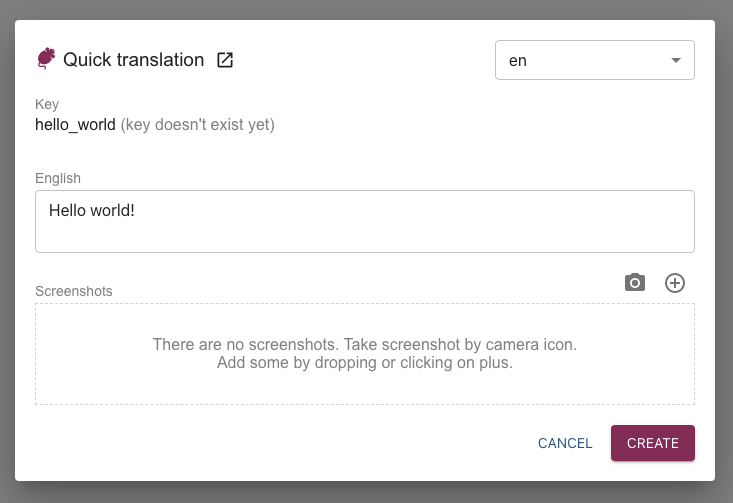
In the quick translation dialog, try to change the value to something else like "Hello universe!" and hit save. See? The
text was changed in the DOM as well.
String saved or edited in the translation dialog is stored in the platform, so you can edit there as well.
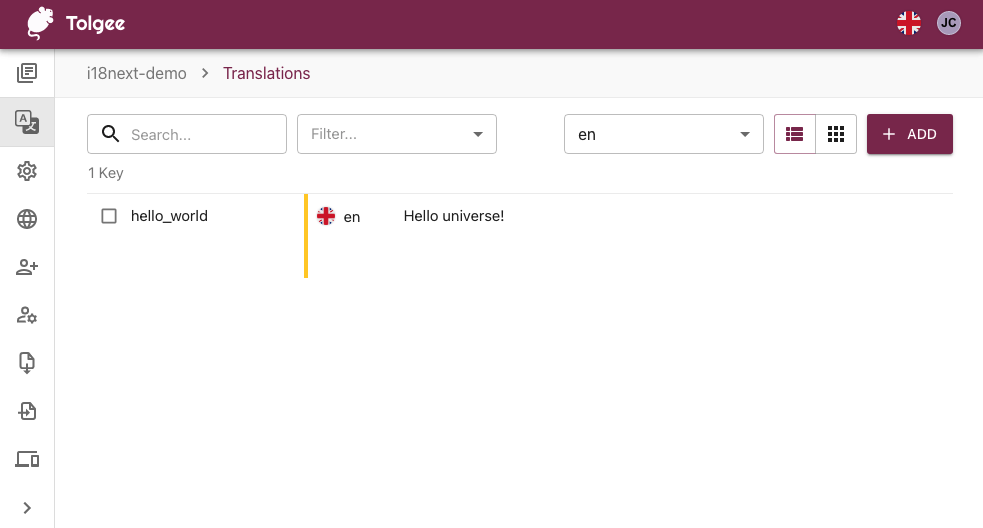
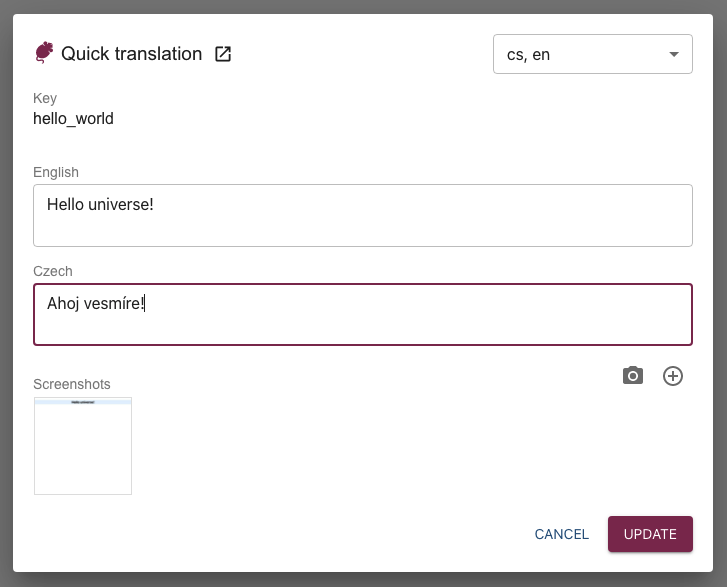
You can also edit more languages in the quick translation dialog. Also, you can take screenshots, which can be later
used by translators, translating your strings in Tolgee platform.
## Your mama can translate like this 👵
Translating using this dialog or Tolgee platform is very simple so anybody from your team or even your mama can
translate your app like this. So when you would like to save some time, you can just provide access to the platform
or/and to the app in development mode and let anybody translate it.
But let's get back to the code.
## Switching the language
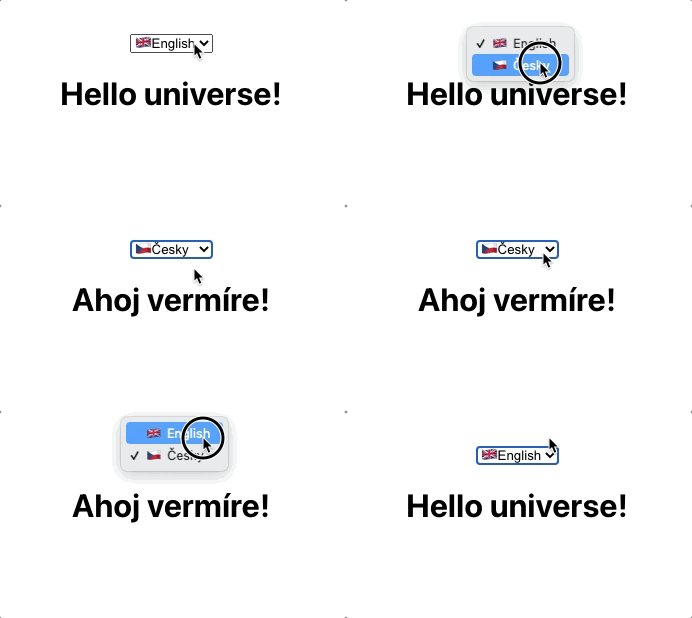
To be able to switch the language, create following `LanguageSelector` component.
```tsx
import React from 'react';
import {useTranslation} from 'react-i18next';
export const LangSelector: React.FC = () => {
const {i18n} = useTranslation();
return (
);
};
```
And use it in the `App` component...
```tsx
{t(`hello_world`)}
```
Great! Now you are able to switch the language!
## Preparing for production
In production mode you **don't want to leak you API key**. You want your translations to be part of the production
build. There are multiple options to obtain your exported localization files.
### Option 1: Using Tolgee Platform
1. Open your project in the Tolgee Platform
2. Click on "Export" item in the side menu
3. Hit "Export as zip of .json files" button
4. Download of exported data starts immediately
### Option 2: Using API endpoint
If you have `curl` installed in your system, you can download the data using it.
```
curl "https://app.tolgee.io/api/project/export/jsonZip?ak=" \
--output data.zip
unzip data.zip
delete data.zip
```
This is useful, when you would like to automate localization data downloading in our CI/CD workflow.
### Using the data
To use your exported data, store them into `src/i18n` folder. So your project structure would look like this:
```
src
...
├── App.tsx
├── LangSelector.tsx
├── i18n
│ ├── cs.json
│ └── en.json
├── index.css
├── index.tsx
...
```
Now, lets provide the data to Tolgee. There are multiple ways, how to do
so [described in docs](https://tolgee.io/docs/web/using_with_i18next/preparing_for_production). But I am going to
provide them as imported static objects, which is good option, since the App is small and there are not many
translations yet.
Go to the `index.tsx` file and import the localization jsons:
```typescript
import enLang from "./i18n/en.json"
import csLang from "./i18n/cs.json"
```
And then provide them to Tolgee config.
```typescript
withTolgee(i18n, {
apiUrl: process.env.REACT_APP_TOLGEE_API_URL,
apiKey: process.env.REACT_APP_TOLGEE_API_KEY,
ui: process.env.REACT_APP_TOLGEE_API_KEY
? require('@tolgee/ui').UI
: undefined,
staticData: {
en: enLang,
cs: csLang
}
})
.use(ICU)
.use(initReactI18next)
.init({
supportedLngs: ['en', 'cs'],
fallbackLng: 'en'
});
```
To test it works, you can comment out the apiKey param. App should be translated without fetching the data from Tolgee
API.
Congrats! 🎉 Now you are able to speed up your localization process!
## TL;DR
- Tolgee is an open-source tool, simplifying localization process and removing unnecessary tasks
- It enables you or your colleagues to modify translated string in the context of developed web application
- Tolgee is also a localization platform, where you can manage all your translations
- If you like our project, please star our projects on GitHub
- [github.com/tolgee/server](https://github.com/tolgee/server) ⭐
- [github.com/tolgee/js](https://github.com/tolgee/js) ⭐
- To read more about i18next Tolgee integration,
visit [Tolgee docs](https://tolgee.io/docs/web/using_with_i18next/installation)